
Booking pages first (Event types second)
Master pages with Booking pages first (Event types second) allow Customers to first select which Booking page they prefer. They can then choose an Event type from the ones that are associated with that Booking page. Finally, the Customer schedules the meeting. The preexisting associations between Booking pages and Event types determine which Event types are offered on your Master page.
In this article, you’ll learn about Master pages with Booking pages first.
The Customer flow
Section titled “The Customer flow”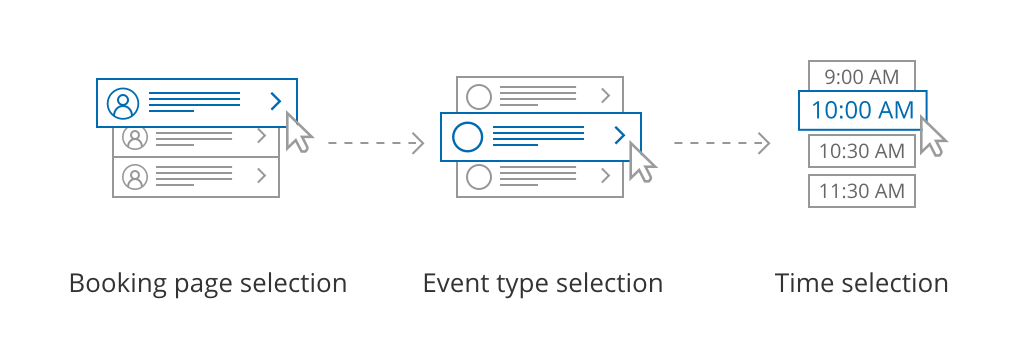 Figure 1: Customer flow for Booking pages first. With Booking pages types first, the Customer first selects the Booking page they prefer and then chooses from the Event types offered by that Booking page.
After selecting an Event type, the Customer is presented with the availability of the Booking page they selected. They can choose a date and time and schedule the meeting.
Requirements
Section titled “Requirements”To create a Master page with a Booking pages first scenario, you must be a OnceHub Administrator.
Setting up a Master page with Booking pages first
Section titled “Setting up a Master page with Booking pages first”- Create a Master page by clicking the Plus button
 in the Master pages pane.
 - In the Scenario field of the New Master page pop-up (Figure 2), select Booking pages first (Event types second).
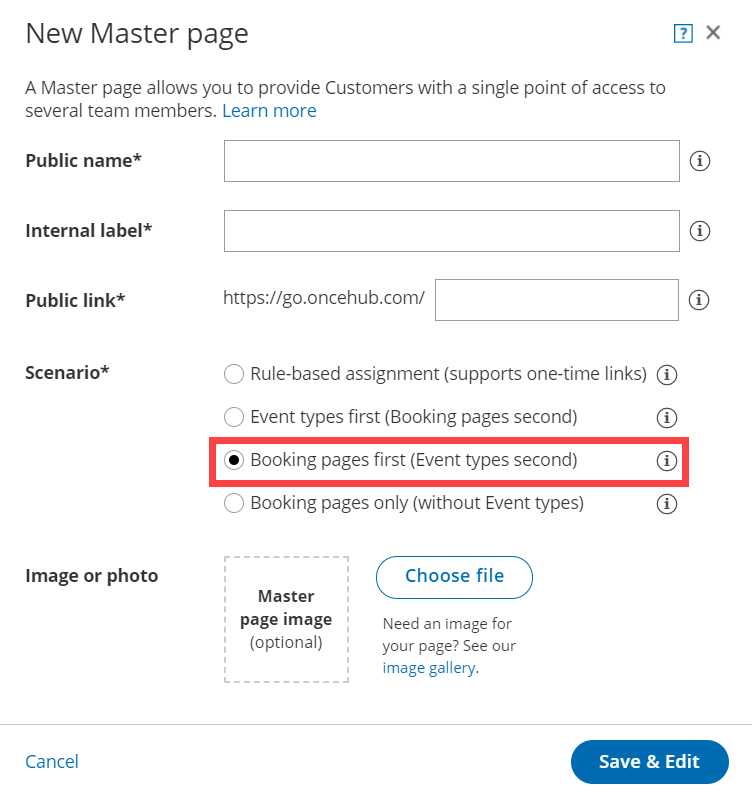 Figure 2: New Master page pop-up
 - Populate the pop-up with a Public name, Internal label, Public link, and an image if you choose. Then click Save & Edit. You’ll be redirected to the Master page Overview section to continue editing your settings.
- Go to the Assignment section of the Master page.
- Use the drop-down menu to select the Booking pages that you want to include in the Master page (Figure 3). Only Booking pages associated with Event types can be included in this Master page.
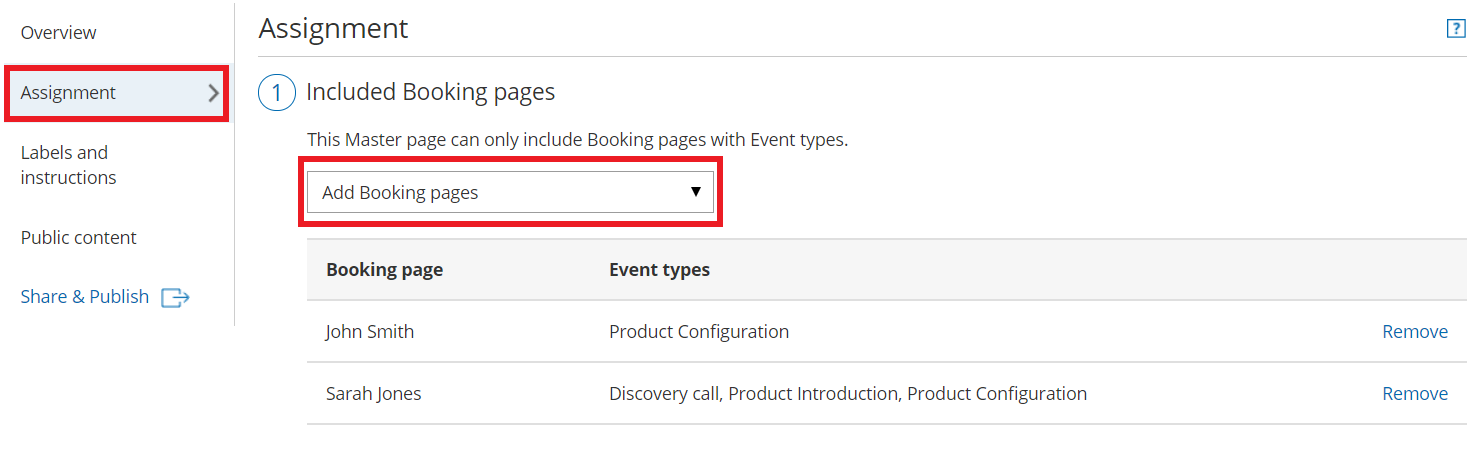 Figure 3: Add Booking pages
 - In the Assignment upon reschedule section (Figure 4), you can choose to assign a rescheduled booking to the same Booking page it was originally assigned to it. To enable this, check the box marked Reschedule is only possible on the page on which the booking was made.
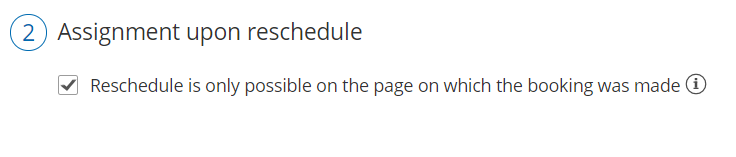 Figure 4: Assignment upon reschedule enabled
 - Click Save.