
Assigning the OnceHub permission set to the Salesforce API user
The Salesforce setup process includes 5 phases: API connection, Installation, Field validation, Field mapping, and Creation rules.
In this article, you’ll learn how to assign the OnceHub Permission Set to the API User in Salesforce.
Permission sets
Section titled “Permission sets”Permission Sets in Salesforce define what functions and features your Users have access to in Salesforce. To use the OnceHub connector for Salesforce, you must assign the appropriate Permission Set to your API User.
The OnceHub Permission Set assigns permissions to work with Lead, Contact, Case, Account, and Activity records. This will allow the OnceHub connector to create and update records through the API User.
Requirements
Section titled “Requirements”To assign the OnceHub permission set, you will need:
- A Salesforce Administrator for your organization.
- An installed OnceHub connector for Salesforce.
Assigning the OnceHub permission Set
Section titled “Assigning the OnceHub permission Set”-
Sign in to Salesforce as your API User.
-
Go to the Setup page.
In the Administration section, go to Users → Permission Sets (Figure 1).
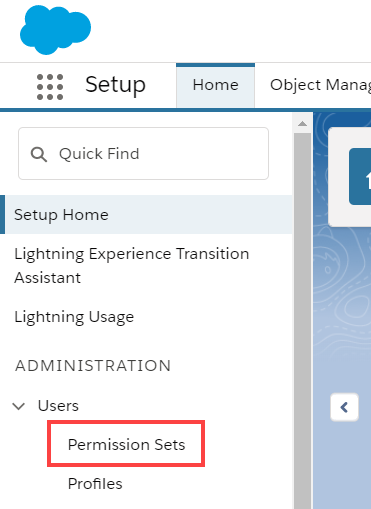 Figure 1: Permission Sets in the Users menu
In the Permission Sets pane, click OnceHub connector for Salesforce permission set (Figure 2).
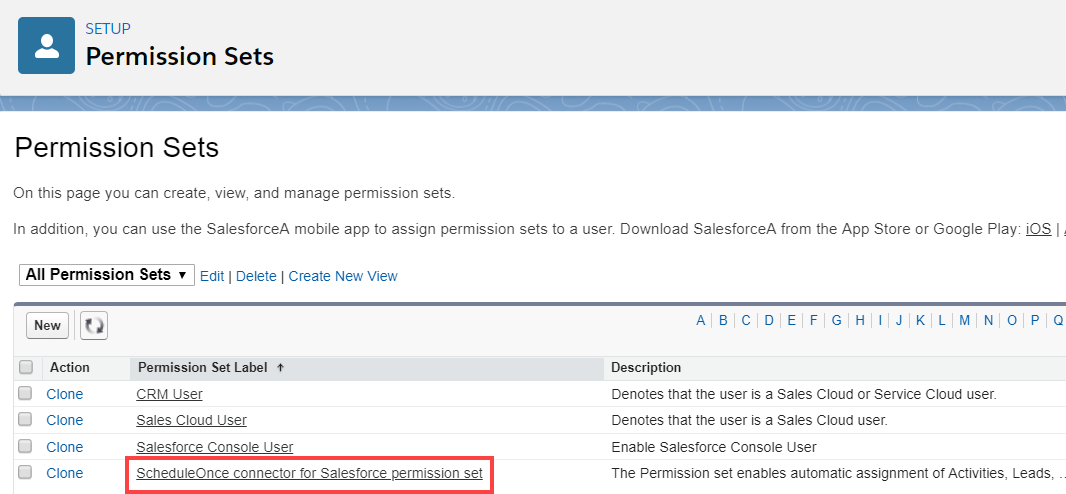 Figure 2: OnceHub connector for Salesforce permission set
On the OnceHub connector for Salesforce permission set page, click the Manage Assignments button (Figure 3).
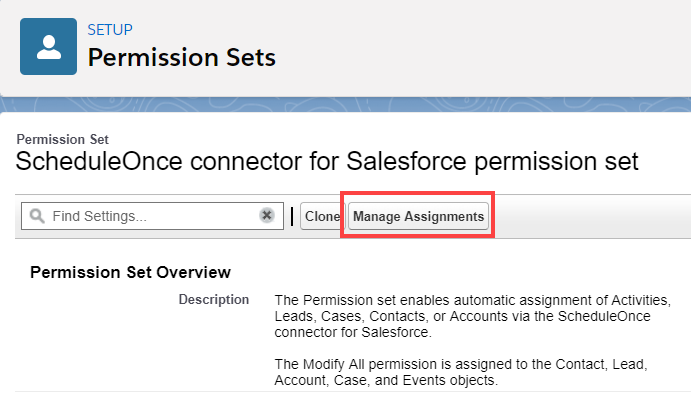 Figure 3: Manage Assignments
On the Assigned Users page, click the Add Assignments button (Figure 4).
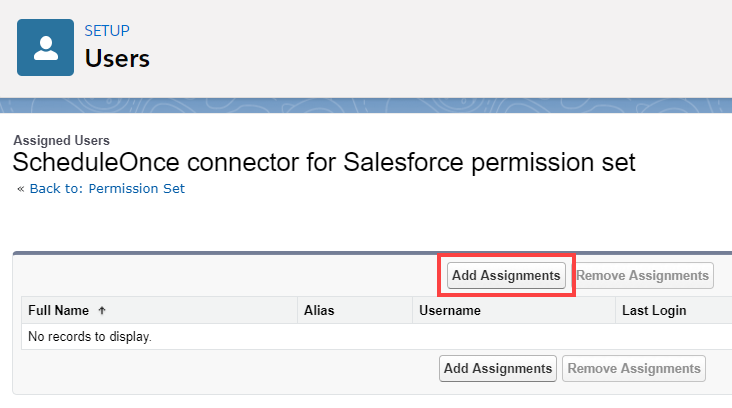 Figure 4: Add Assignments
In the All Users list, check the box next to your API User and click Assign (Figure 5).
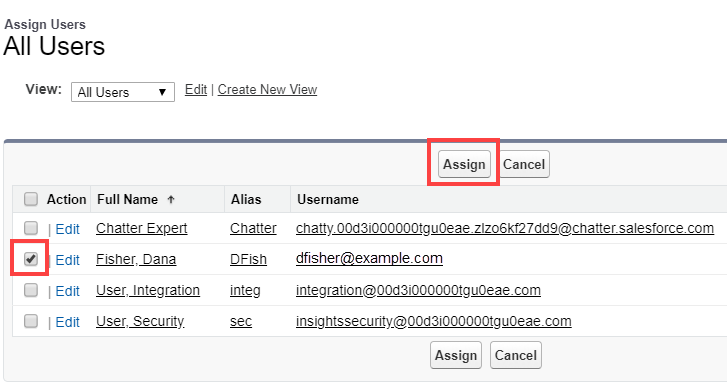 Figure 5: Assign API user
-
Click Done.
-
Go back to the Salesforce setup page in OnceHub.
-
After you refresh the page, the Installation tab will now be updated to show that you have completed Step 2: Assign OnceHub Permission set.
That’s it! You’ve completed Step 2 of the Installation process. You can now proceed to Step 3, which is described in the Adding Custom fields to the Salesforce Activity Event layout article.