
Installing the OnceHub connector for Salesforce
The Salesforce setup process includes 5 phases: API connection, Installation, Field validation, Field mapping, and Creation rules.
Installation is a three step process. In this article, you will learn about the first step: installing the OnceHub connector package in Salesforce. The OnceHub connector for Salesforce is installed directly from OnceHub.
Requirements
Section titled “Requirements”To install the connector from OnceHub, you must:
- Be a OnceHub Administrator.
- Be a Salesforce Administrator in your organization.
- Have an active connection to your Salesforce API User.
You do not need an assigned product license to install and update Salesforce account settings. Learn more
Installing the OnceHub connector for Salesforce
Section titled “Installing the OnceHub connector for Salesforce”- Click the gear icon located in the top-right corner of the page.
- Select Account Integrations from the dropdown menu.
- Filter for CRM.
- Click on the Salesforce (For Booking Pages) tile.
- In the Salesforce box, click the Setup button (Figure 1).
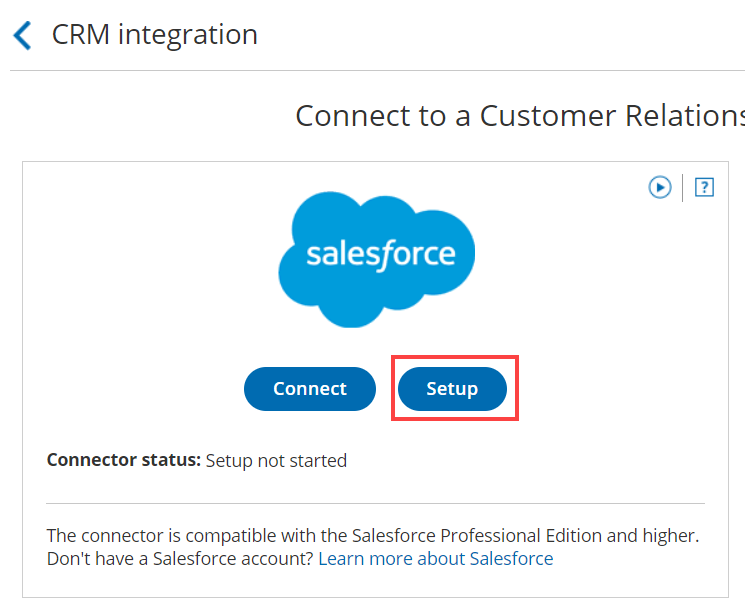 Figure 1: Set up API Connection in OnceHub
 - On the Installation tab, click the Install connector button (Figure 2).
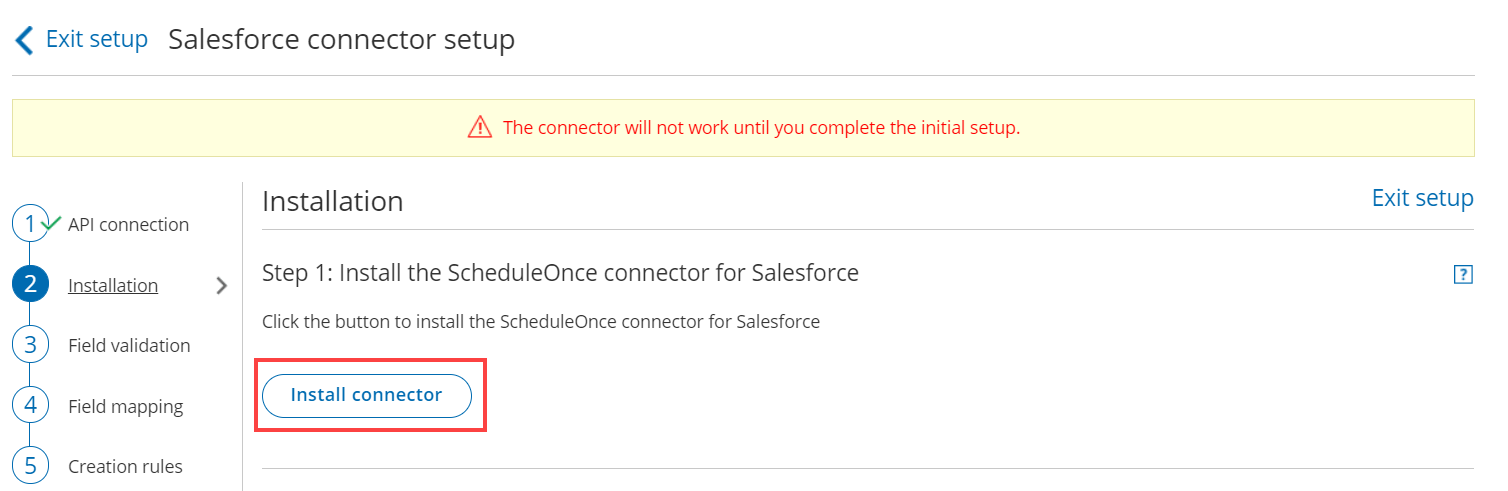 Figure 2: Install connector
 - Sign in to Salesforce.
- On the Salesforce Install Package landing page, select Install for All Users and then click the Install button (Figure 3).
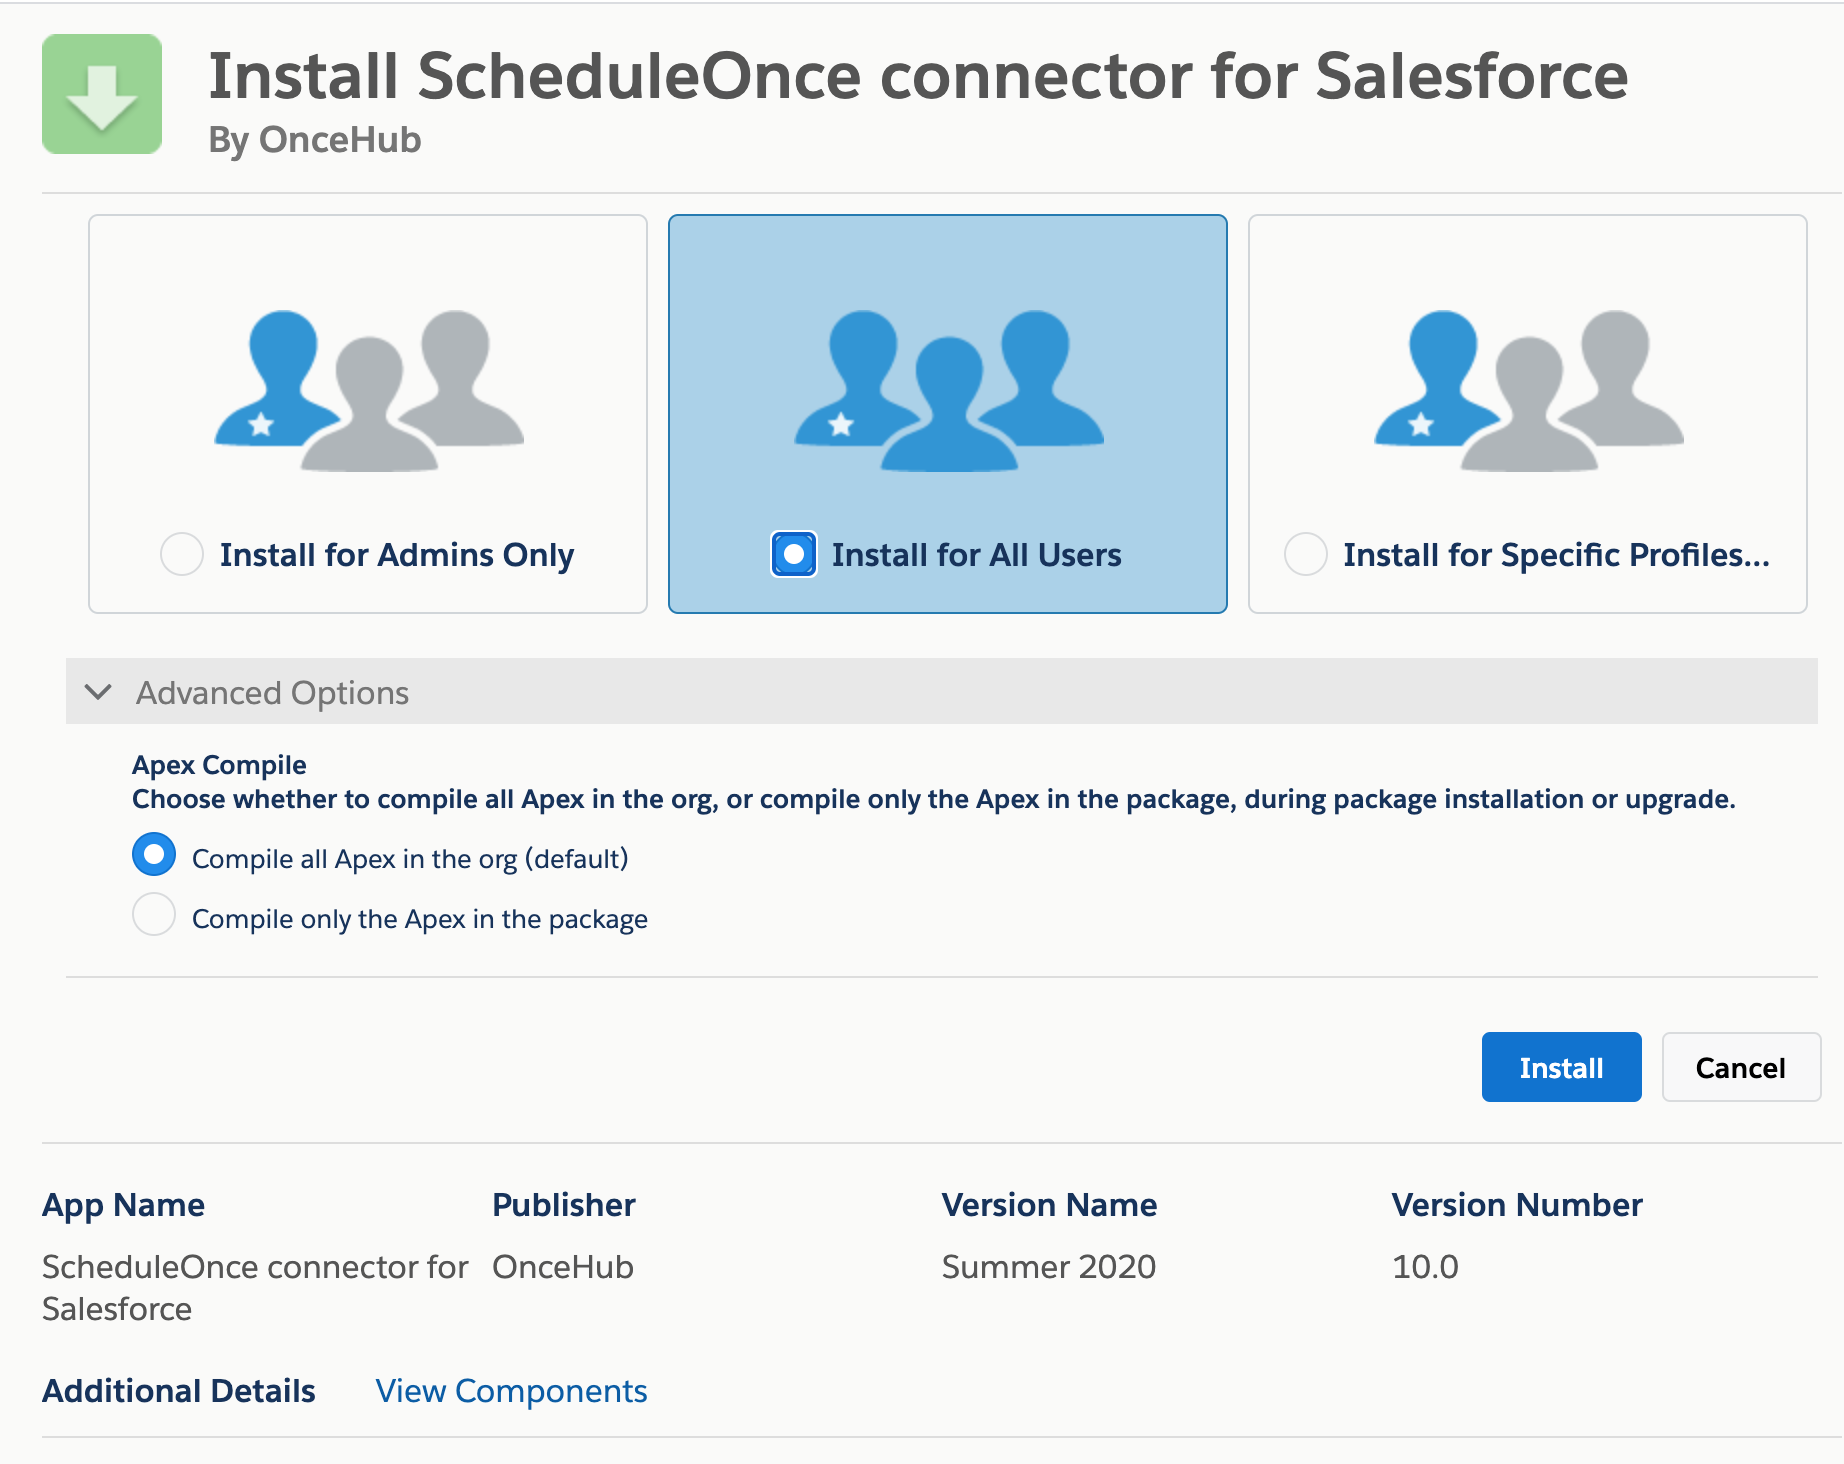 Figure 3: Install for All Users
 - Once installation is complete, click the Done button.
- Return to OnceHub and reload the page, then go back to the Installation tab. You will see that the connector is now installed (Figure 4).
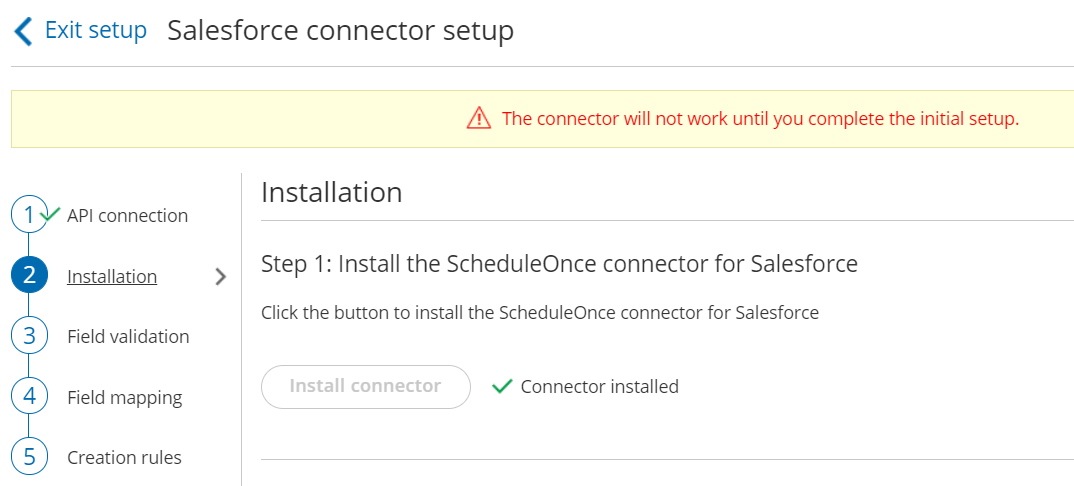 Figure 4: Connector installed
That’s it! You’ve completed Step 1 of the Installation process. Now you can proceed to Step 2, which is described in the How to assign the OnceHub permission set to the Salesforce API User article.