Personalizing with dynamic URL parameters [Classic]
Personalized links using URL parameters are Booking page links that contain Customer information and Booking form data. With Personalized links (URL parameters), prospects and Customers click on your Booking page link and pick a time, without having to provide any information that is already known to you.
The Booking form can either be prepopulated with their details or skipped altogether. You can also add source tracking tags to personalized Booking page links, letting you analyze where your bookings come from.
Note When you use Personalized links with Booking pages that are not associated with any Event types, it is highly recommended you provide the Subject field of your Booking form.
You can do this by going to Booking pages on the left → Relevant Booking page**→** Booking form and redirect. In the Meeting subject section, select Meeting subject is set by the Owner (you). You can then enter a meeting subject for your specific business case.
Learn more about the Subject field
<script id="snippet-prepend">$(function(){
/*disable in widget*/ if($('.w-documentation-article').length === 0){
var ToC = "<nav role='navigation' class='table-of-contents toc-top'><h4>In this article:" + "<ul>"; var el, title, link, header; //Define the heading levels you want to use in ascending order. Can add extra or remove unneeded. $(".hg-article-body h1, .hg-article-body h2, .hg-article-body h3, .hg-article-body h4").each(function() { el = $(this); title = el.text(); if(title != ''){ anchorTitle = el.text().replace(/([~!@#$%^&*()_+=`{}\[\]\|\\:;'<>,.\/\? ])+/g, '-').toLowerCase(); link = "#" + anchorTitle; //Set all headers to a 0-nesting level. header = 'header-nesting-0'; //Adjust header-nesting layers so that they point to the correct html tag. header-nesting-1 should match the second .hg-article-body h# listed above; header-nesting-2 should match the third, etc. if($(this).is('h2')){ header = 'header-nesting-1'; }else if($(this).is('h3')){ header = 'header-nesting-2' } el.html('<a id="'+anchorTitle+'" class="toc-anchor">' + el.html()); newLine = "<li class='"+header+"'>" + "<a class='article-anchor' href='" + link + "'>" + title + "" + "";
ToC += newLine; } }); ToC += "" + ""; $("#snippet-prepend").before(ToC); }});
</script><style>/* CSS to style the TOC as it displays and the auto-created anchors.toc-top styles the box for the TOC; adjust styles here to tweak look and feel */
.toc-top { background-color: #FAFAFA; /* set to #fff or delete entirely for no background */ border: 1px solid #C8C8C8; /* adjust the color hex here to change border color */ box-shadow: 0 1px 1px rgba(0, 0, 0, 0.05) inset; margin-top: 24px; margin-bottom: 36px; min-height: 20px; padding: 13px 20px; max-width: 75%;}.toc-top h4 { font-size: 18px; line-height: 26px; margin: 0 0 8px; font-weight: 400;}.toc-top ul { padding: 0 0 0 15px !important; margin-bottom: 0;}.toc-top > ul { margin-bottom: 13px!important;}.toc-anchor { display: block; height: 90px; margin-top: -90px; visibility: hidden;}
/* Set the indentation for the nesting levels. May need to be edited to match changes above. Increase or decrease the margin-left to get your desired level of indentation. */.header-nesting-1 { margin-left: 14px;}.header-nesting-1:before { background-image: url(https://dyzz9obi78pm5.cloudfront.net/app/image/id/5d31bcc88e121c9b25ba22c4/n/bulletv2.svg)!important;}.header-nesting-2 { margin-left: 28px;}.header-nesting-2:before { background-image: url(https://dyzz9obi78pm5.cloudfront.net/app/image/id/5d31be536e121cf22b0cc6ae/n/bulletv3.svg)!important;}</style>Creating a Personalized link (URL parameters)
Section titled “Creating a Personalized link (URL parameters)”-
Go to Booking pages in the bar on the left → Booking page → Share & Publish.
-
Select the Mail merge tab.
-
Select the relevant Booking page in the drop-down menu (Figure 1).
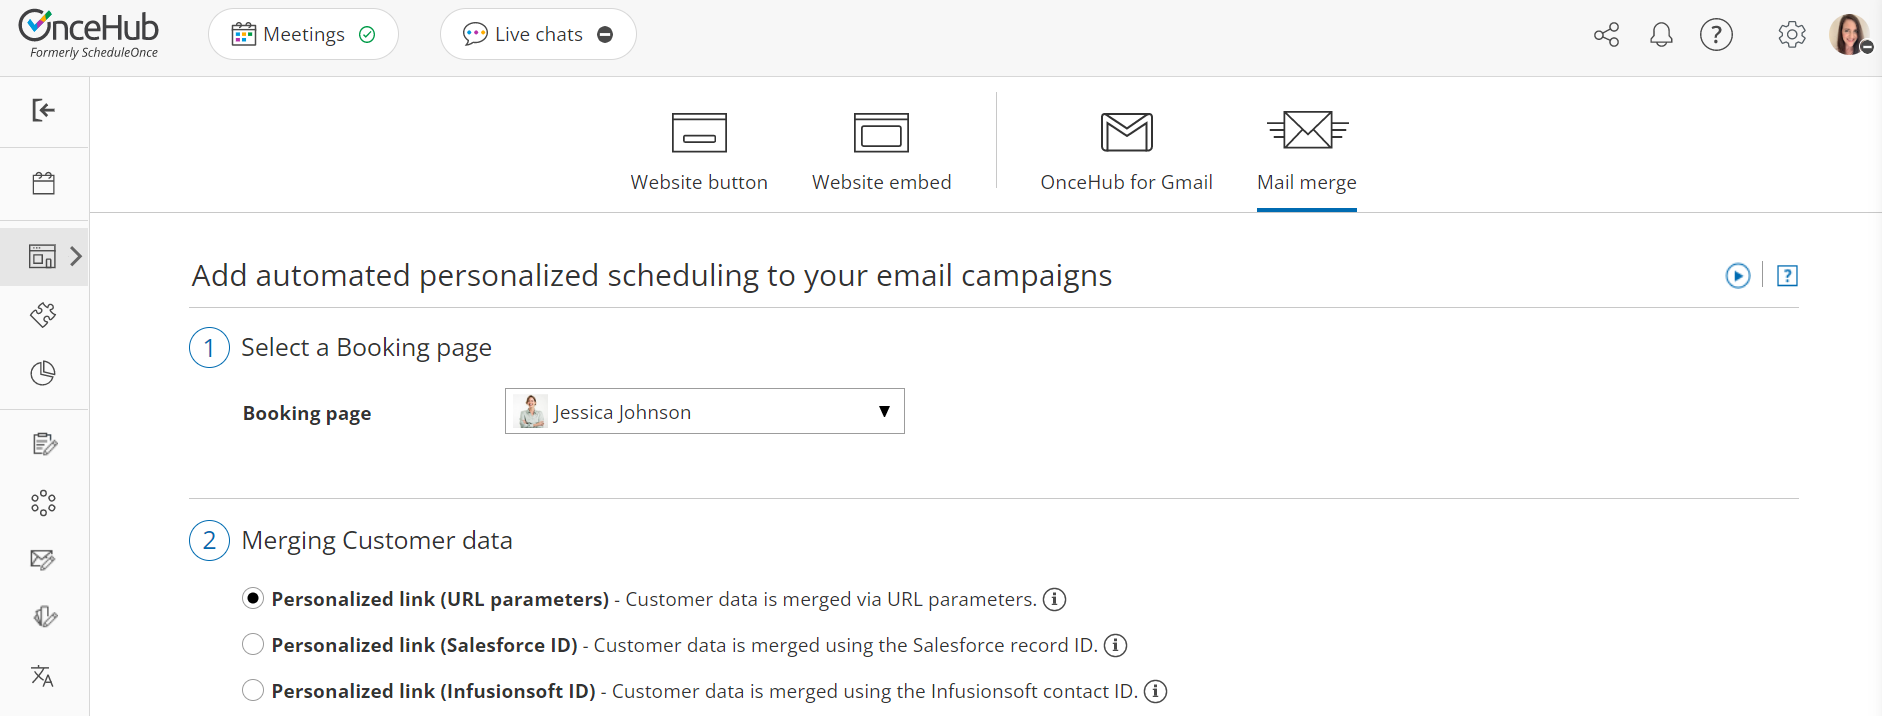
Figure 1: Select a Booking page drop-down menu
-
In the Customer data step (Figure 2), select Personalized link (URL parameters).

Figure 2: Customer data step
-
In the Booking form step, you can select one of the two options below:
- Skip the Booking form: Skipping the Booking form helps you maximize your booking conversions and provides your Customers with a quicker booking process.
- Prepopulate the Booking form: If you select this option, the booking data is visible in the Booking form and can be edited by the Customer before submission. Learn more about prepopulated Booking forms
-
In the Copy link step, click Copy link to copy the Personalized link to your clipboard (Figure 3).
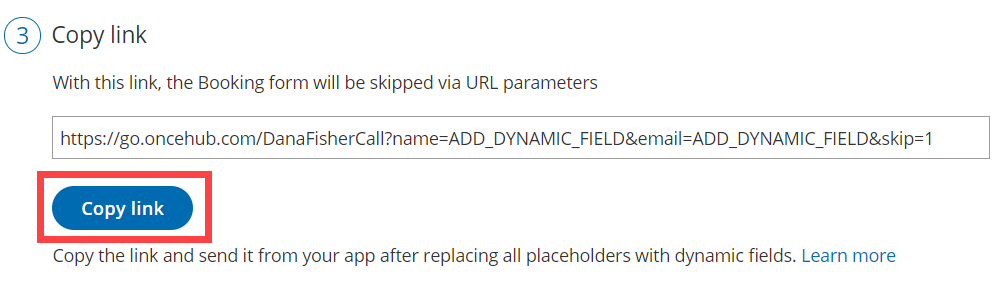 Figure 3: Copy link step
Adding your own URL parameters
Section titled “Adding your own URL parameters”If you need to replace the ADD_DYNAMIC_FIELD placeholders (Figure 4) with your own parameters, you can copy the link to a notepad. Learn more about supported OnceHub URL parameters
Merged values must be properly encoded in order to be passed in the URL. Some characters like at (@), period (.), dash (-) and underscore (_) are OK, but all URL invalid characters like plus (+) or space ( ) must be URL encoded.
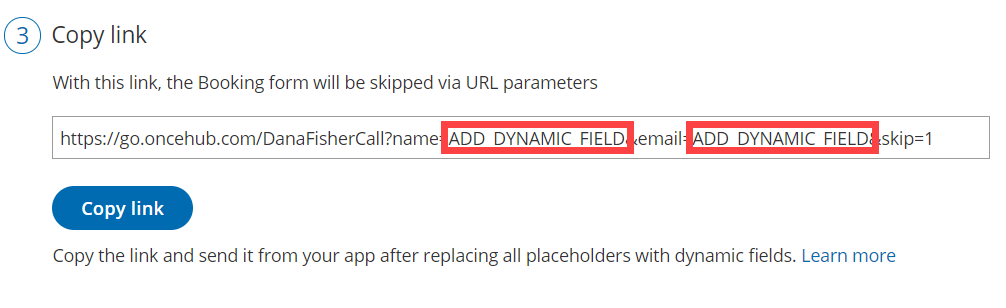 Figure 4: ADD_DYNAMIC_FIELD placeholders
For example, if you use MailChimp, the link might look like this:
https://go.oncehub.com/dana?name=\*|NAME|\*&email=\*|EMAIL|\*
In this example, the *|NAME|* and *|EMAIL|* fields are merge fields which are replaced with a single Customer name and email respectively during the email campaign, creating a personalized email for each lead in your list.