Using Personalized links (Salesforce ID) [Classic]
When you schedule with existing Salesforce Leads, Contacts, Person Accounts, or Case records, you can use our Personalized links (Salesforce ID) in your Salesforce email templates and Salesforce emails. Your Customers will be automatically recognized based on their Salesforce Record ID.
In this article, you’ll learn about using Personalized links (Salesforce ID).
<script id="snippet-prepend">$(function(){
/*disable in widget*/ if($('.w-documentation-article').length === 0){
var ToC = "<nav role='navigation' class='table-of-contents toc-top'><h4>In this article:" + "<ul>"; var el, title, link, header; //Define the heading levels you want to use in ascending order. Can add extra or remove unneeded. $(".hg-article-body h1, .hg-article-body h2, .hg-article-body h3, .hg-article-body h4").each(function() { el = $(this); title = el.text(); if(title != ''){ anchorTitle = el.text().replace(/([~!@#$%^&*()_+=`{}\[\]\|\\:;'<>,.\/\? ])+/g, '-').toLowerCase(); link = "#" + anchorTitle; //Set all headers to a 0-nesting level. header = 'header-nesting-0'; //Adjust header-nesting layers so that they point to the correct html tag. header-nesting-1 should match the second .hg-article-body h# listed above; header-nesting-2 should match the third, etc. if($(this).is('h2')){ header = 'header-nesting-1'; }else if($(this).is('h3')){ header = 'header-nesting-2' } el.html('<a id="'+anchorTitle+'" class="toc-anchor">' + el.html()); newLine = "<li class='"+header+"'>" + "<a class='article-anchor' href='" + link + "'>" + title + "" + "";
ToC += newLine; } }); ToC += "" + ""; $("#snippet-prepend").before(ToC); }});
</script><style>/* CSS to style the TOC as it displays and the auto-created anchors.toc-top styles the box for the TOC; adjust styles here to tweak look and feel */
.toc-top { background-color: #FAFAFA; /* set to #fff or delete entirely for no background */ border: 1px solid #C8C8C8; /* adjust the color hex here to change border color */ box-shadow: 0 1px 1px rgba(0, 0, 0, 0.05) inset; margin-top: 24px; margin-bottom: 36px; min-height: 20px; padding: 13px 20px; max-width: 75%;}.toc-top h4 { font-size: 18px; line-height: 26px; margin: 0 0 8px; font-weight: 400;}.toc-top ul { padding: 0 0 0 15px !important; margin-bottom: 0;}.toc-top > ul { margin-bottom: 13px!important;}.toc-anchor { display: block; height: 90px; margin-top: -90px; visibility: hidden;}
/* Set the indentation for the nesting levels. May need to be edited to match changes above. Increase or decrease the margin-left to get your desired level of indentation. */.header-nesting-1 { margin-left: 14px;}.header-nesting-1:before { background-image: url(https://dyzz9obi78pm5.cloudfront.net/app/image/id/5d31bcc88e121c9b25ba22c4/n/bulletv2.svg)!important;}.header-nesting-2 { margin-left: 28px;}.header-nesting-2:before { background-image: url(https://dyzz9obi78pm5.cloudfront.net/app/image/id/5d31be536e121cf22b0cc6ae/n/bulletv3.svg)!important;}</style>Key benefits of using Personalized links (Salesforce ID)
Section titled “Key benefits of using Personalized links (Salesforce ID)”Recognizing a Customer by their Record ID provides two key benefits:
- On the User side, it allows you to update the correct record, eliminating any chance of updating the wrong record.
- On the Customer side, it allows you to prepopulate the Booking form step with Salesforce record data or completely skip the Booking form step. This eliminates the need to ask Customers for information you already have, improving conversion rates and moving leads through the funnel faster.
Personalized links (Salesforce ID) are available for Booking pages and Master pages.
- When you work with Booking pages, Personalized links (Salesforce ID) will be available only for Booking pages owned by Users connected to Salesforce.
- When you work with Master pages, Personalized links (Salesforce ID) will always be available to you. However, Booking pages owned by Users who are not connected to Salesforce will work as General links.
NoteFor security and privacy reasons, using CRM record IDs to skip or prepopulate the Booking form is not compatible with collecting data from an embedded Booking page or redirecting booking confirmation data.
Creating a Personalized link (Salesforce ID)
Section titled “Creating a Personalized link (Salesforce ID)”NoteTo use data from a database in a prepopulated Booking form, you must be connected to Salesforce.
- Log into OnceHub, hover over the lefthand menu. and go to the Booking pages icon → hover over the lefthand sidebar → Share & Publish, where you can access the Mail merge tab.
- Select the relevant Booking page or Master page.
- Under Merging customer data, select the Personalized links (Salesforce ID) (Figure 1).
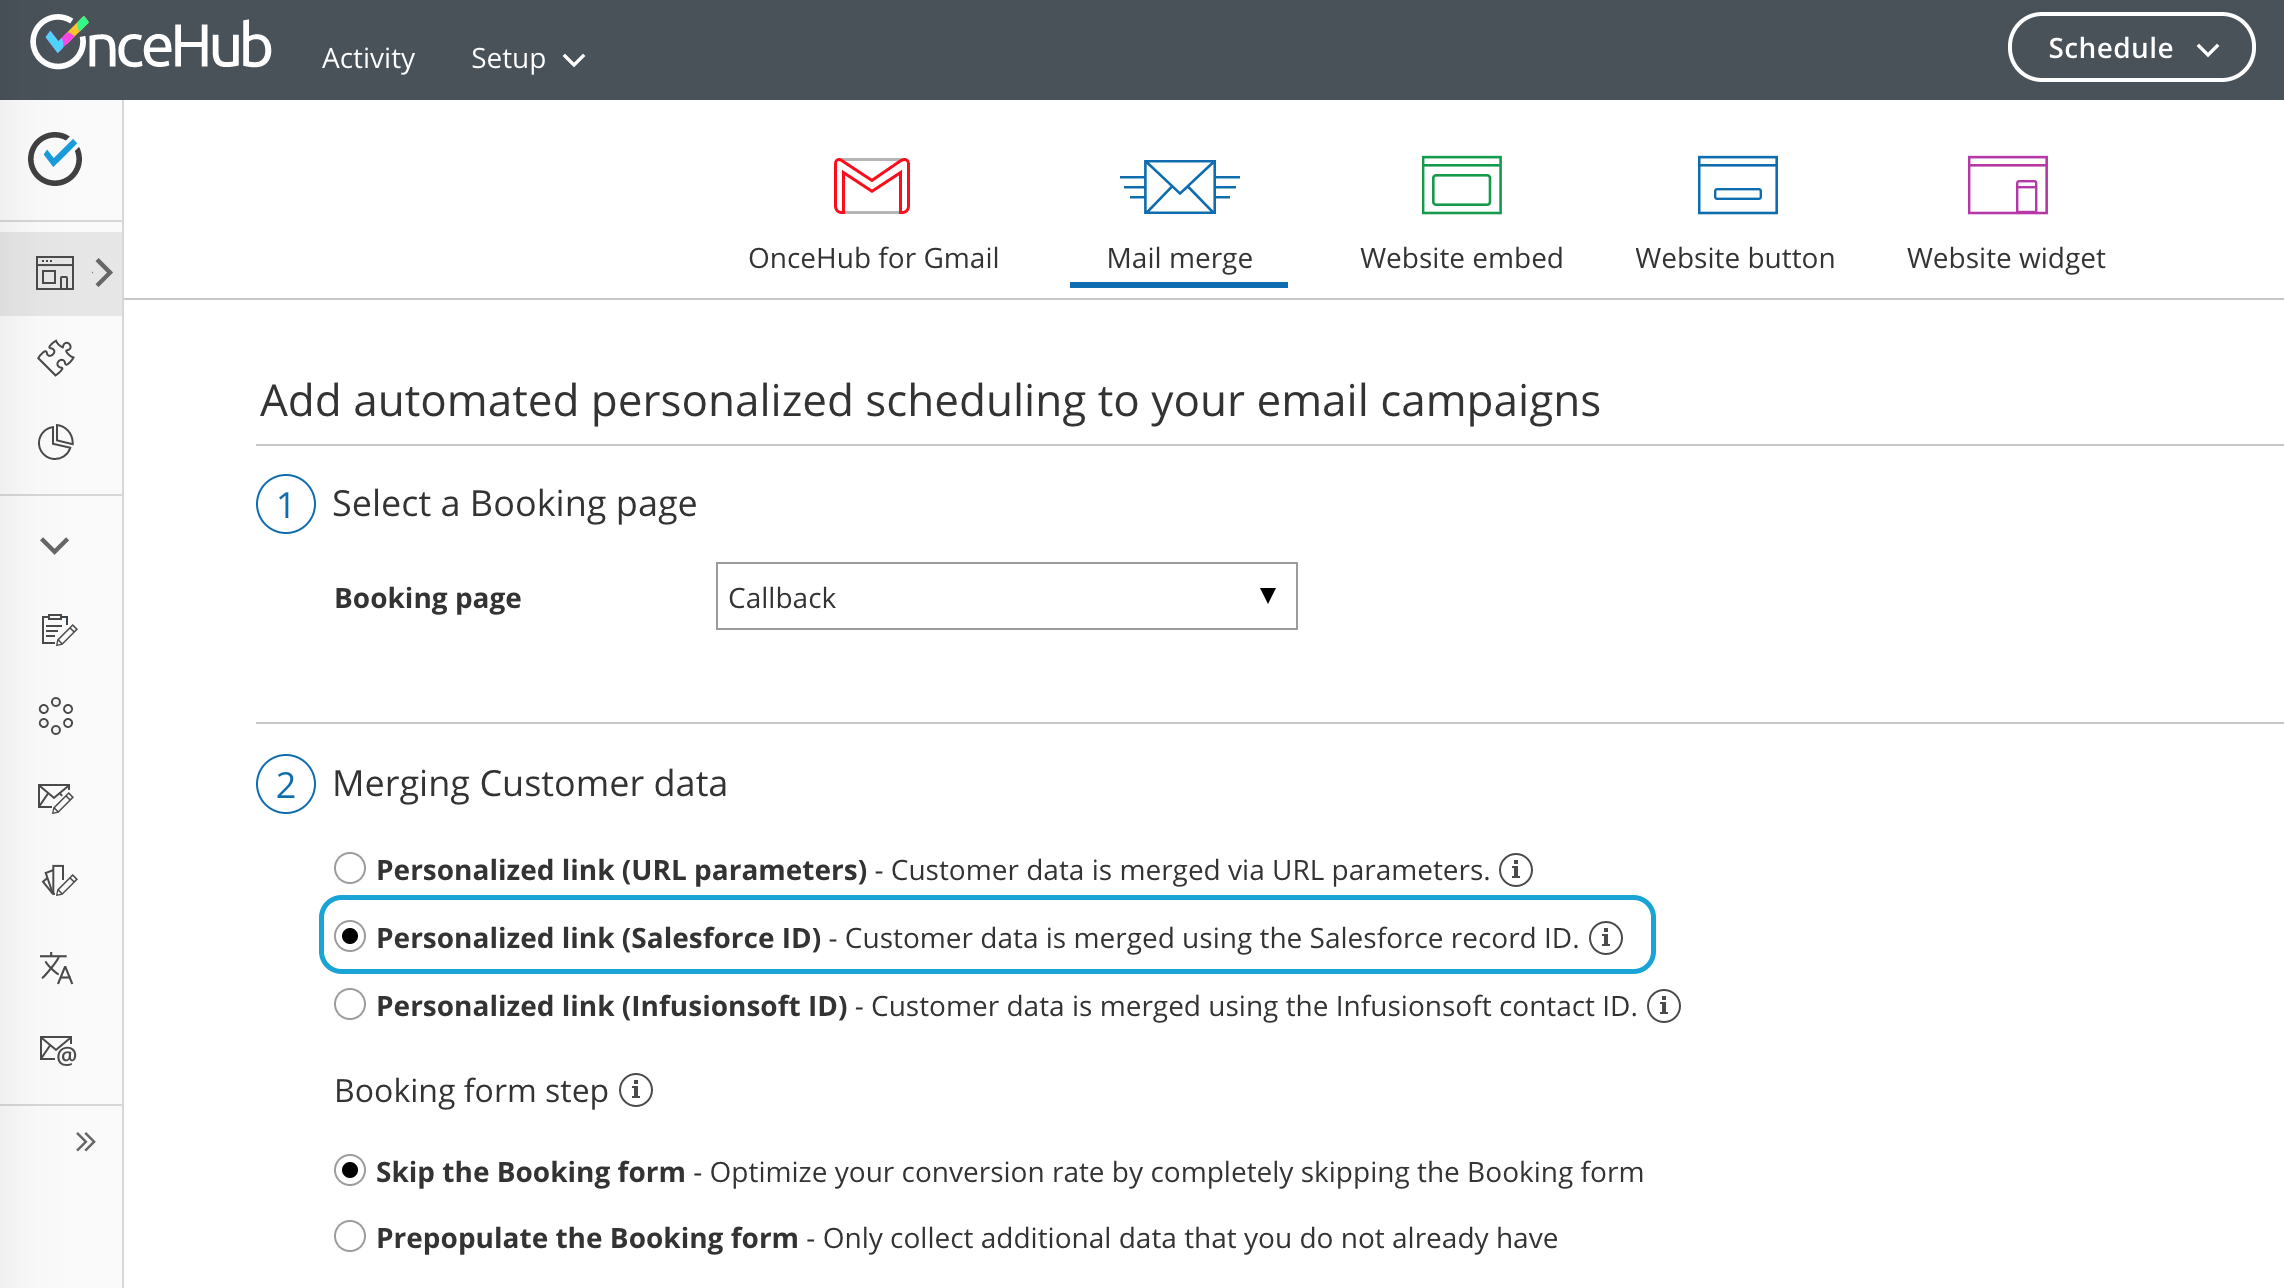
- In the Booking form step, you can select one of the two options below:
- Skip the Booking form: Skipping the OnceHub Booking form helps you maximize your booking conversions and provides your Customers with a quicker booking process.
- Prepopulate the Booking form: The Booking form works in private mode. In this mode, prepopulated data can’t be viewed or edited by the Customer before submission. The prepopulated data used in the Booking is indicated as a checklist and the Customer can provide additional information if required. Learn more about prepopulated Booking forms
- Click Copy link to copy the Personalized link to your clipboard (Figure 3). You can now paste the link into your Salesforce email templates and Salesforce emails.