Master pages: Labels and instructions [Classic]
In the Master page Labels and instructions section, you can define the public labels for the different entities in your Master page. You can also customize instructions that will help your Customers make the right selections during the scheduling process.
You can access this section by going to to Booking pages on the left and select the relevant Master page → Labels and instructions.
NoteThe settings vary based on the Master page scenario, and whether you have public categories in your account.
<script id="snippet-prepend">$(function(){
/*disable in widget*/ if($('.w-documentation-article').length === 0){
var ToC = "<nav role='navigation' class='table-of-contents toc-top'><h4>In this article:" + "<ul>"; var el, title, link, header; //Define the heading levels you want to use in ascending order. Can add extra or remove unneeded. $(".hg-article-body h1, .hg-article-body h2, .hg-article-body h3, .hg-article-body h4").each(function() { el = $(this); title = el.text(); if(title != ''){ anchorTitle = el.text().replace(/([~!@#$%^&*()_+=`{}\[\]\|\\:;'<>,.\/\? ])+/g, '-').toLowerCase(); link = "#" + anchorTitle; //Set all headers to a 0-nesting level. header = 'header-nesting-0'; //Adjust header-nesting layers so that they point to the correct html tag. header-nesting-1 should match the second .hg-article-body h# listed above; header-nesting-2 should match the third, etc. if($(this).is('h2')){ header = 'header-nesting-1'; }else if($(this).is('h3')){ header = 'header-nesting-2' } el.html('<a id="'+anchorTitle+'" class="toc-anchor">' + el.html()); newLine = "<li class='"+header+"'>" + "<a class='article-anchor' href='" + link + "'>" + title + "" + "";
ToC += newLine; } }); ToC += "" + ""; $("#snippet-prepend").before(ToC); }});
</script><style>/* CSS to style the TOC as it displays and the auto-created anchors.toc-top styles the box for the TOC; adjust styles here to tweak look and feel */
.toc-top { background-color: #FAFAFA; /* set to #fff or delete entirely for no background */ border: 1px solid #C8C8C8; /* adjust the color hex here to change border color */ box-shadow: 0 1px 1px rgba(0, 0, 0, 0.05) inset; margin-top: 24px; margin-bottom: 36px; min-height: 20px; padding: 13px 20px; max-width: 75%;}.toc-top h4 { font-size: 18px; line-height: 26px; margin: 0 0 8px; font-weight: 400;}.toc-top ul { padding: 0 0 0 15px !important; margin-bottom: 0;}.toc-top > ul { margin-bottom: 13px!important;}.toc-anchor { display: block; height: 90px; margin-top: -90px; visibility: hidden;}
/* Set the indentation for the nesting levels. May need to be edited to match changes above. Increase or decrease the margin-left to get your desired level of indentation. */.header-nesting-1 { margin-left: 14px;}.header-nesting-1:before { background-image: url(https://dyzz9obi78pm5.cloudfront.net/app/image/id/5d31bcc88e121c9b25ba22c4/n/bulletv2.svg)!important;}.header-nesting-2 { margin-left: 28px;}.header-nesting-2:before { background-image: url(https://dyzz9obi78pm5.cloudfront.net/app/image/id/5d31be536e121cf22b0cc6ae/n/bulletv3.svg)!important;}</style>Public label
Section titled “Public label”Public labels are Customer-facing and are displayed during the scheduling process as the Customer makes selections. They are also used in scheduling confirmation pages and emails. If you have public categories in your account, you can set their labels here as Customers will see them.
For example, if the Event types in your Master page represent a product (Figure 1), then it will be listed as such in the confirmation page (Figure 2).
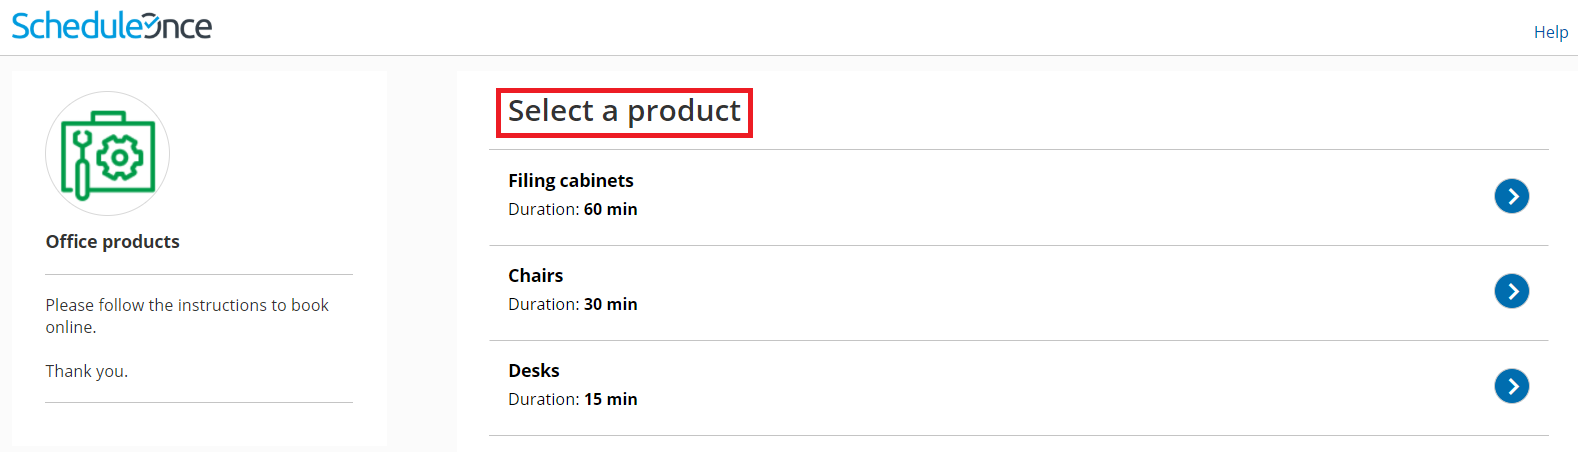 Figure 1: Adding a public label to an Event type
Figure 2: Booking confirmation page
Selection instructions
Section titled “Selection instructions”In this section, you tell Customers what they should select. This section and its contents are different depending on the scenario you chose for your Master page. Only relevant fields will be displayed.
Specify the instructions to help your Customers understand what they are choosing. These instructions appear in the appropriate steps in the booking process.
For example, if you make the Selection instructions for Event types “Select a product” (Figure 3), then the title of the Event type selection step in the Customer scheduling flow will be “Select a product” (Figure 4).
Figure 3: Selection instructions section
Figure 4: Event type selection